“To imitate the appearance or character”
A simulation recreates a specific emotion or environment, which is experienced by the user. They can be found in a variety of places and are used for many different purposes, such as, teaching in schools, training for employees,computer simulation for research, entertainment, etc.
I began brainstorming different situations and surroundings that create a complete atmosphere. I decided to focus my attention towards common experiences that people had a greater perception of. This would allow me to investigate ways to stimulate a combination of multiple senses in the viewer in order to create an extreme atmosphere.
My initial thoughts were of Visual Merchandising displays as they are an immediate example of simulating an environment in an appealing way order to attract attention.


I researched into Visual Merchandising and a lot of their shop window displays are often very seasonal. This inspired me to consider simulating nature or weather; as these areas people can easily identify with. Their general occurrence in day-to-day life, along with the prolific use of them for promotional purposes has given these topics a vast number of means for representation.
After narrowing my selection of themes down to the ones I was most inspired by, I finally settled on rain, as I was intrigued by both its visual and kinetic qualities.


Olafur Eliasson is well-known for his large-scale, elemental sculptures and installations. In 2003, he focused his attention on weather and installed ‘The Weather Project’ into the Tate Modern. Using a combination of lights and humidifiers he has tried to recreate the effects of the sun. Eliasson’s aim was to try to highlight the fact that weather has become integrated into part of everyday conversation. Each of his works tries to focus on a specific aesthetic quality within the chosen natural occurrence.

I find Eliasson’s use of light pivotal within his installations and will consider the use of light very carefully in my own simulation in order to achieve the desired effect.
Tomás Saraceno explores how human beings live in combination to their environments and how they are influenced by them. His ‘Cloud Cities’ are architectural pieces based on a utopian theory and they explore different forms of interaction between air and land and the viewer. He has also investigated creating optimum, controlled environments within his biospheres.


Saraceno’s attention to user interaction is very important as it defines the intension of the piece. I plan to make my simulation a complete atmosphere that involves multiple senses in the viewer, so in order to achieve this I must identify how they will engage with the piece
I began researching into films which featured a simulated experience. I found that the majority of them were based on a psychological manipulation, either through the introduction or removal of new memories/experiences. Also, a number of them contained storylines written around a vulnerability people may have to certain situations or surroundings or common aversions.
This has made me consider looking into psychological issues such as phobias, the impact they have on people and the types of methods used to try to overcome them.
Pho.b.ia: a diverse collection of seemingly unrelated objects and artworks under the umbrella of fear, dislike and aversion.
In this exhibition I visited, a range of phobias have been portrayed from popular aversions, such as spiders, to very idiosyncratic pathological terrors, such as buttons, wrinkles or long words and amongst the pieces of artwork were names of various phobias from which people suffer.

After investigating ‘What defines a phobia?’, ‘What symptoms can present with phobias?’ and ‘What types of phobias there are?’, I have then looked into the two main methods used to help overcome irrational fears; CBT (Cognitive Behavioural Therapy) and Immersion Therapy.
Immersion Therapy is the most common method that uses simulation. This allows the person so be exposed to the subject in a controlled environment and gradually leads to desensitization.
Ombrophobia is the fear of rain. The two most common causes of this fear are being told at a young age that going out in the rain will make you sick, which can then manifest into an immense fear or the feeling of depression that is often associated with a grey sky. I find the association with depression rather interesting and this has led me to consider building a simulation that tries to address the issue by creating a ‘rain storm’ in a controlled and peaceful environment.
http://www.youtube.com/watch?v=p7QL46cK7B8
The use of artificial rain is commonly seen in many TV adverts, music videos and films; such as ‘Spiderman’, ‘Singing in the rain’, ‘High Fidelity’ and intentionally identified in ‘The Truman Show’. I began investigating into special effects methods. Some rain scenes, not created by computer technology, are made using combinations of rain bars, rain stands and miles of pipes.

To create my rain simulation, I am going to incorporate the use of pipework and taps, which will allow me to control where the water is inserted and monitor the flow of liquid into to the installation.
I have looked into artificial rain on a smaller scale, in a more controlled environment.


Instead of using water, these decorative features use a combination of glycerine and fishing line. The viscosity of the glycerine allows it to adhere to the fishing line so that the positioning of each line of rainfall is controlled.
I have also discovered this method had been used on a much larger scale on a rain fountain in Southern California’s Topanga Plaza Shopping Centre in Woodland Hills, made in 1964.


By adopting the use of fishing line and glycerine in my own installation it allows me to have more control over my simulation and still maintain a visual quality within the simulation even if there is limited rainfall.

- 2m x 2m x 2m
- Circular central base to stand on
- Walkway to and from it on 2 adjacent sides to allow entrance and exit to the simulation
- Threads of fishing line attached from the roof to the floor keeping the walkway and central base clear for the viewer to pass through
- Glycerine dripping down the fishing line to create rain effect
- Network of pipes on the roof
- Pipes pierced and fishing line threaded through
- Drainage trough on the floor
- Holes in the base to allow fishing line and glycerine to pass through
- Pump to pump the glycerine from the trough up through the pipes on the roof
- Dark room
- LED’s in the roof
I have decided to have my rain simulation in a dark room to allow the rainfall to be the main focus of the piece and not be detracted from by other visual elements. The insertion on LED lights into the design is to allow enough light into the piece so the user can see what is happening around them. To make the experience more realistic I plan to position the LED’s in star constellations to make it appear like a night’s sky.

I did consider including an umbrella that would hang from the roof above the central base over the viewer, however this would block out a large number of LED lights and would deem their function useless so I decided not to go ahead with this idea.

The area available to build my simulation does not easily facilitate something to the scale that I have designed, so I need to address this problem. In addition, the use of fishing line and glycerine in the design removes the element of sound created by the landing of water droplets, so a recording of the sound of rain will need to be included to enhance the atmosphere. Due to the fact the receptors for four out of the five senses can only be found on the head, I have decided to reduce the size of the simulation, so that it no longer encompasses the whole body, only the head and shoulders. By doing this, the construction of the design becomes more practical, whilst maintaining the overall effect of the simulator.

The method used to create the simulation remains unchanged
- 1m in diameter, 0.5m high
- Suspended from the ceiling
- Hole to enter from underneath
- Head and shoulders only area of the body inside the simulation.
- Column of black fabric around the edge of the hole from the base to the floor to block out any outside light
This design was then adjusted to include the use of struts instead of hanging it from the ceiling due to the weight of the simulation and provide it with some rigidity.

- 1m x 1m x 1.8m (Area for the simulation only 0.5m)
- Sound effects of rain played in mini speakers situated in the corners of the simulation.
Although entering the simulation from underneath allows you to experience the simulation over a full 360°, it is not very practical for people who have limited mobility or if anyone using it wishes to leave quickly, for example: in the case of a panic attack.

- 1m x 1.1m x 1.8m (Area for the simulation only 0.6m)
- Curved area for user to stand in
- Fabric hanging behind them to block out any outside light
- Ease of access
I have collected a couple of different sounds effects of rain that could be used with my simulation.
I feel that the second one with the slight bit of thunder suggests a much heavier rainfall so I don’t feel that would be appropriate. The remaining two are both suitable for the simulation, however I prefer the distinct sound of the individual drops in the first one so I think I will use that sound effect for my simulation.
Due to the size of the simulation the cost of certain materials for my design, such as fishing line and glycerine, are not manageable so some alterations have to be made.
- The fishing line and glycerine will have to be replaced with water
- The walls to the simulation then need to be made water-resistant to accommodate this change so I plan to make them out of shower curtains
- Drainage system in place to allow the water to reach the pump and stop too much water collecting on the surface of the base of the simulation and overflowing
- MDF roof rather than marine ply or acrylic
When making my simulation, I have coated the underneath of my wood (inside the simulation) in waterproof, black paint and I have inserted small pieces of black, plastic drinking straws into each of the drilled holes, where the water drips through and glued them into place, in order to try to protect the wood from the water and prevent it from swelling.
I came across this rainfall sound effect made by a choir and found the method used to create it was very interesting. I felt that the effect was enhanced as the rain storm gradually got stronger. I do not plan to use this method in my own in my own final piece as the rain storm I plan to create won’t be as stong and I don’t feel that it is as realistic when simulating a lighter rainfall.
When researching into Olafur Elliasson, I came across a limited edition book ‘Concepts in Space’. It is about the experimental art and architecture of Olafur Elliasson.


I was most inspired by the custom-made cover of this book. It is a high gloss polished and cold formed steel plate imitating the effect of raindrops falling onto water.
This led me to design my drainage system, based around this idea. I decided to drill a series of holes in concentric circles into a sheet of aluminium and then, using doming punches and Fimo clay, (as a replacement for pitch) hammer each one so that the holes were dimpled, which would enhance the visual effect of ripples and direct the water into them so that it drained away into the trough.


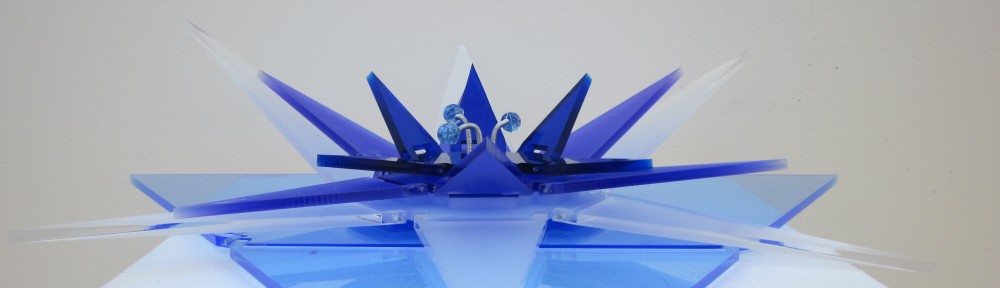
I recently visited the Yayoi Kusama exhibition, at the Tate Modern, where I became very inspired by her work, especially “Infinity Mirrored Room – Filled with the Brilliance of Life”.


After altering my design from using glycerine and fishing line to create the rain effect to just using water dripping down, I felt this simplified the simulation quite a bit and didn’t maintain the same visual effect that would constantly exist from the fishing line so I decided to add mirrors to the interior to create an infinity wall effect. This would allow the dripping rain to appear to continue on forever and enhance the visual impact of the piece for the purpose of immersion therapy.
Now I am using water instead of fishing line and glycerine, the sound of the water hitting the sheet of aluminium will make the need for adding a sound effect redundant. Therefore, I am going to remove it from my simulation.
Issues I need to consider:
- Transporting my simulation – I need to build my simulation so that it can easily be taken apart, transported in a vehicle and rebuilt in its desired location
- Ensuring my electrics are all protected from the water
- No sharp edges for the user to hurt themselves on
- The pipe for the water is firmly secure
- Ensuring my mirrors are securely held in place
- Ensuring sure the structure is sturdy
- Ensuring the least amount of water is used to reduce weight on the roof and enable a reasonable sized reservoir for the pump
Before I pierced the holes in my pipe to allow the water to drip through, I needed to work out what tool would be the most suitable. To do this I started with a fine sewing needle and gradually worked my way up increasing in size, each time filling the pipe with water, blocking off the end and then blowing through it in order to create a similar pressure that would be created by the pump and seeing if any water would drip through. This concluded with using a pair of nail scissors.
I have built my simulation using knock down corners and right-angled brackets. This allows me to easily take it apart and rebuild it and also helps to keep the structure square so that each aspect of the simulation fits and when the mirrors are inserted there is no added strain placed upon them. Also, I built the whole structure on an MDF base so that the struts supporting the simulation didn’t move and made sure the simulation was sturdy and rigid.
I have placed rubber piping around the curve that I have cut out of the aluminium sheet so that the user is protected from any sharp edges. Each of the mirrors have been attached to the battens with double-sided, sticky pads and then glued into place for extra security. A layer of glue has also been placed around the bottom to seal in any water and make the edges of the drainage sheet water tight. In addition, I have soldered the electrics for my LED’s on the roof and covered them in insulation tape in order to protect them against any moisture.

I have attached black fabric around the edge of the curve, where the user stands, down to the floor to hide the mechanical side of the simulation: the drainage system and pump. I have painted the floor black to continue the aesthetics. I have also covered the roof in black fabric to stop the light passing through any of the holes, I have drilled for the water to drip through, so that only the light from the LED’s illuminates the simulation.
Additional aspects I had to deal with:
- Research into different types of pumps to make sure the appropriate pump was used that was powerful enough to pump the water up to the network of pipes on the roof
- Research into plastic tubing to find suppliers of differing diameters, which fit inside each other, to reduce the size to decrease the volume and weight of water as small as possible for practicality and health and safety
- Cutting the glass mirrors down to size to fit inside the simulation
- Making sure the plastic sheeting and funnel leading from the aluminium sheet to the container with the pump was water tight
- Extra battens added to the structure to support the mirrors
- Make a switch for LED’s that was easily accessible
Whilst making this simulation I have encountered a few problems.
Although I glued down the edges of the pipe to make it water-tight, I still experienced some flooding on the top of my wood when the pump was switched on due to the fact that when I pierced the holes in the pipe the force pushing from the other side broke some of the seals. I then proceeded to re-glue all the edges again. Even after doing this I still experienced small amounts of flooding; however it was less than the previous time so I continued to repeat this process until it stopped. Unfortunately, as I had only protected the wood on the inside on the simulation and inside each hole as I hadn’t foreseen there being any major leaks the MDF had already started to swell. This could have been from either/or a combination of the top of the wood getting wet between the pipes or the water droplets not dripping straight down through the holes but running along the underneath of the pipe where the wood was not protected.
These effects then resulted in a new problem. After stopping the pipe from leaking on the roof, I then turned on the pump to see how the simulation appeared on the inside from the user’s point of view. I then discovered that out the 25m of pipe that I had pierced at roughly 1 inch intervals, only a limited number of holes had water dripping through. I do not know what exactly has caused this but I only guess at either the unlikely scenario that the wood has swollen so much that there is no room for the water to drip through or that from re-sealing the entire pipe again from the leaks the glue has sealed up a large number of the holes.
If I was to remake this simulation I would definitely spend the extra money and have an acrylic roof that I then drilled the holes into so that it was water proof and would be less of a problem if any leaks did occur.
Ursa Minor

Cassiopeia

Ursa Major

Basic Structure

Internal View


Floor With Rain


Ceiling

Internal View With Rain

