Simulating Experience

“To imitate the appearance or character”

A simulation recreates a specific emotion or environment, which is experienced by the user.  They can be found in a variety of places and are used for many different purposes, such as, teaching in schools, training for employees,computer simulation for research, entertainment, etc.

I began brainstorming different situations and surroundings that create a complete atmosphere. I decided to focus my attention towards common experiences that people had a greater perception of. This would allow me to investigate ways to stimulate a combination of multiple senses in the viewer in order to create an extreme atmosphere.

My initial thoughts were of Visual Merchandising displays as they are an immediate example of simulating an environment in an appealing way order to attract attention.

I researched into Visual Merchandising and a lot of their shop window displays are often very seasonal. This inspired me to consider simulating nature or weather; as these areas people can easily identify with. Their general occurrence in day-to-day life, along with the prolific use of them for promotional purposes has given these topics a vast number of means for representation.

After narrowing my selection of themes down to the ones I was most inspired by, I finally settled on rain, as I was intrigued by both its visual and kinetic qualities.

Olafur Eliasson is well-known for his large-scale, elemental sculptures and installations. In 2003, he focused his attention on weather and installed ‘The Weather Project’ into the Tate Modern.  Using a combination of lights and humidifiers he has tried to recreate the effects of the sun.  Eliasson’s aim was to try to highlight the fact that weather has become integrated into part of everyday conversation. Each of his works tries to focus on a specific aesthetic quality within the chosen natural occurrence.

I find Eliasson’s use of light pivotal within his installations and will consider the use of light very carefully in my own simulation in order to achieve the desired effect.

Tomás Saraceno explores how human beings live in combination to their environments and how they are influenced by them. His ‘Cloud Cities’ are architectural pieces based on a utopian theory and they explore different forms of interaction between air and land and the viewer.  He has also investigated creating optimum, controlled environments within his biospheres.

Saraceno’s attention to user interaction is very important as it defines the intension of the piece.  I plan to make my simulation a complete atmosphere that involves multiple senses in the viewer, so in order to achieve this I must identify how they will engage with the piece

I began researching into films which featured a simulated experience.  I found that the majority of them were based on a psychological manipulation, either through the introduction or removal of new memories/experiences.  Also, a number of them contained storylines written around a vulnerability people may have to certain situations or surroundings or common aversions.

This has made me consider looking into psychological issues such as phobias, the impact they have on people and the types of methods used to try to overcome them.

Pho.b.ia: a diverse collection of seemingly unrelated objects and artworks under the umbrella of fear, dislike and aversion. 

In this exhibition I visited, a range of phobias have been portrayed from popular aversions, such as spiders, to very idiosyncratic pathological terrors, such as buttons, wrinkles or long words and amongst the pieces of artwork were names of various phobias from which people suffer.

After investigating ‘What defines a phobia?’, ‘What symptoms can present with phobias?’ and ‘What types of phobias there are?’, I have then looked into the two main methods used to help overcome irrational fears; CBT (Cognitive Behavioural Therapy) and Immersion Therapy.

Immersion Therapy is the most common method that uses simulation. This allows the person so be exposed to the subject in a controlled environment and gradually leads to desensitization.

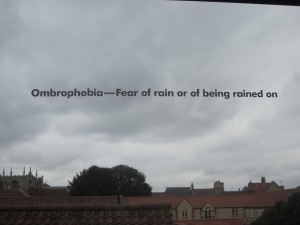
Ombrophobia is the fear of rain. The two most common causes of this fear are being told at a young age that going out in the rain will make you sick, which can then manifest into an immense fear or the feeling of depression that is often associated with a grey sky. I find the association with depression rather interesting and this has led me to consider building a simulation that tries to address the issue by creating a ‘rain storm’ in a controlled and peaceful environment.

http://www.youtube.com/watch?v=p7QL46cK7B8

The use of artificial rain is commonly seen in many TV adverts, music videos and films; such as ‘Spiderman’, ‘Singing in the rain’, ‘High Fidelity’ and intentionally identified in ‘The Truman Show’. I began investigating into special effects methods. Some rain scenes, not created by computer technology, are made using combinations of rain bars, rain stands and miles of pipes.

To create my rain simulation, I am going to incorporate the use of pipework and taps, which will allow me to control where the water is inserted and monitor the flow of liquid into to the installation.

I have looked into artificial rain on a smaller scale, in a more controlled environment.

Instead of using water, these decorative features use a combination of glycerine and fishing line. The viscosity of the glycerine allows it to adhere to the fishing line so that the positioning of each line of rainfall is controlled.

I have also discovered this method had been used on a much larger scale on a rain fountain in Southern California’s Topanga Plaza Shopping Centre in Woodland Hills, made in 1964.

By adopting the use of fishing line and glycerine in my own installation it allows me to have more control over my simulation and still maintain a visual quality within the simulation even if there is limited rainfall.

  • 2m x 2m x 2m
  • Circular central base to stand on
  • Walkway to and from it on 2 adjacent sides to allow entrance and exit to the simulation
  • Threads of fishing line attached from the roof to the floor keeping the walkway and central base clear for the viewer to pass through
  • Glycerine dripping down the fishing line to create rain effect
  • Network of pipes on the roof
  • Pipes pierced and fishing line threaded through
  • Drainage trough on the floor
  • Holes in the base to allow fishing line and glycerine to pass through
  • Pump to pump the glycerine from the trough up through the pipes on the roof
  • Dark room
  • LED’s in the roof

I have decided to have my rain simulation in a dark room to allow the rainfall to be the main focus of the piece and not be detracted from by other visual elements. The insertion on LED lights into the design is to allow enough light into the piece so the user can see what is happening around them. To make the experience more realistic I plan to position the LED’s in star constellations to make it appear like a night’s sky.

I did consider including an umbrella that would hang from the roof above the central base over the viewer, however this would block out a large number of LED lights and would deem their function useless so I decided not to go ahead with this idea.

The area available to build my simulation does not easily facilitate something to the scale that I have designed, so I need to address this problem. In addition, the use of fishing line and glycerine in the design removes the element of sound created by the landing of water droplets, so a recording of the sound of rain will need to be included to enhance the atmosphere.  Due to the fact the receptors for four out of the five senses can only be found on the head, I have decided to reduce the size of the simulation, so that it no longer encompasses the whole body, only the head and shoulders. By doing this, the construction of the design becomes more practical, whilst maintaining the overall effect of the simulator.

The method used to create the simulation remains unchanged

  • 1m in diameter, 0.5m high
  • Suspended from the ceiling
  • Hole to enter from underneath
  • Head and shoulders only area of the body inside the simulation.
  • Column of black fabric around the edge of the hole from the base to the floor to block out any outside light

This design was then adjusted to include the use of struts instead of hanging it from the ceiling due to the weight of the simulation and provide it with some rigidity.

  • 1m x 1m x 1.8m (Area for the simulation only 0.5m)
  • Sound effects of rain played in mini speakers situated in the corners of the simulation.

Although entering the simulation from underneath allows you to experience the simulation over a full 360°, it is not very practical for people who have limited mobility or if anyone using it wishes to leave quickly, for example: in the case of a panic attack.

  • 1m x 1.1m x 1.8m (Area for the simulation only 0.6m)
  • Curved area for user to stand in
  • Fabric hanging behind them to block out any outside light
  • Ease of access

I have collected a couple of different sounds effects of rain that could be used with my simulation.

Rain Sound Effect 1

Rain Sound Effect 2

Rain Sound Effect 3

I feel that the second one with the slight bit of thunder suggests a much heavier rainfall so I don’t feel that would be appropriate. The remaining two are both suitable for the simulation, however I prefer the distinct sound of the individual drops in the first one so I think I will use that sound effect for my simulation.

Due to the size of the simulation the cost of certain materials for my design, such as fishing line and glycerine, are not manageable so some alterations have to be made.

  • The fishing line and glycerine will have to be replaced with water
  • The walls to the simulation then need to be made water-resistant to accommodate this change so I plan to make them out of shower curtains
  • Drainage system in place to allow the water to reach the pump and stop too much water collecting on the surface of the base of the simulation and overflowing
  • MDF roof rather than marine ply or acrylic

When making my simulation, I have coated the underneath of my wood (inside the simulation) in waterproof, black paint and I have inserted small pieces of black, plastic drinking straws into each of the drilled holes, where the water drips through and glued them into place, in order to try to protect the wood from the water and prevent it from swelling.

I came across this rainfall sound effect made by a choir and found the method used to create it was very interesting. I felt that the effect was enhanced as the rain storm gradually got stronger. I do not plan to use this method in my own in my own final piece as the rain storm I plan to create won’t be as stong and I don’t feel that it is as realistic when simulating a lighter rainfall.

When researching into Olafur Elliasson, I came across a limited edition book ‘Concepts in Space’. It is about the experimental art and architecture of Olafur Elliasson.

I was most inspired by the custom-made cover of this book. It is a high gloss polished and cold formed steel plate imitating the effect of raindrops falling onto water.

This led me to design my drainage system, based around this idea.  I decided to drill a series of holes in concentric circles into a sheet of aluminium and then, using doming punches and Fimo clay, (as a replacement for pitch) hammer each one so that the holes were dimpled, which would enhance the visual effect of ripples and direct the water into them so that it drained away into the trough.

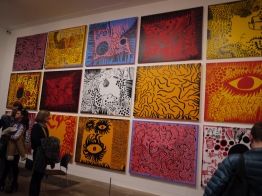
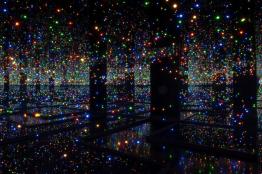
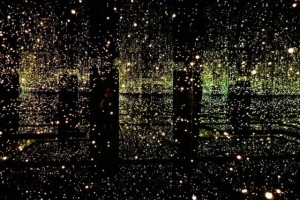
I recently visited the Yayoi Kusama exhibition, at the Tate Modern, where I became very inspired by her work, especially “Infinity Mirrored Room – Filled with the Brilliance of Life”.

After altering my design from using glycerine and fishing line to create the rain effect to just using water dripping down, I felt this simplified the simulation quite a bit and didn’t maintain the same visual effect that would constantly exist from the fishing line so I decided to add mirrors to the interior to create an infinity wall effect.  This would allow the dripping rain to appear to continue on forever and enhance the visual impact of the piece for the purpose of immersion therapy.

Now I am using water instead of fishing line and glycerine, the sound of the water hitting the sheet of aluminium will make the need for adding a sound effect redundant. Therefore, I am going to remove it from my simulation.

Issues I need to consider:

  • Transporting my simulation – I need to build my simulation so that it can easily be taken apart, transported in a vehicle and rebuilt in its desired location
  • Ensuring my electrics are all protected from the water
  • No sharp edges for the user to hurt themselves on
  • The pipe for the water is firmly secure
  • Ensuring my mirrors are securely held in place
  • Ensuring sure the structure is sturdy
  • Ensuring the least amount of water is used to reduce weight on the roof and enable a reasonable sized reservoir for the pump

Before I pierced the holes in my pipe to allow the water to drip through, I needed to work out what tool would be the most suitable. To do this I started with a fine sewing needle and gradually worked my way up increasing in size, each time filling the pipe with water, blocking off the end and then blowing through it in order to create a similar pressure that would be created by the pump and seeing if any water would drip through. This concluded with using a pair of nail scissors.

I have built my simulation using knock down corners and right-angled brackets. This allows me to easily take it apart and rebuild it and also helps to keep the structure square so that each aspect of the simulation fits and when the mirrors are inserted there is no added strain placed upon them.  Also, I built the whole structure on an MDF base so that the struts supporting the simulation didn’t move and made sure the simulation was sturdy and rigid.

I have placed rubber piping around the curve that I have cut out of the aluminium sheet so that the user is protected from any sharp edges. Each of the mirrors have been attached to the battens with double-sided, sticky pads and then glued into place for extra security. A layer of glue has also been placed around the bottom to seal in any water and make the edges of the drainage sheet water tight.  In addition, I have soldered the electrics for my LED’s on the roof and covered them in insulation tape in order to protect them against any moisture.

I have attached black fabric around the edge of the curve, where the user stands, down to the floor to hide the mechanical side of the simulation: the drainage system and pump. I have painted the floor black to continue the aesthetics. I have also covered the roof in black fabric to stop the light passing through any of the holes, I have drilled for the water to drip through, so that only the light from the LED’s illuminates the simulation.

Additional aspects I had to deal with:

  • Research into different types of pumps to make sure the appropriate pump was used that was powerful enough to pump the water up to the network of pipes on the roof
  • Research into plastic tubing to find suppliers of differing diameters, which fit inside each other, to reduce the size to decrease the volume and weight of water as small as possible for practicality and health and safety
  • Cutting the glass mirrors down to size to fit inside the simulation
  • Making sure the plastic sheeting and funnel leading from the aluminium sheet to the container with the pump was water tight
  • Extra battens added to the structure to support the mirrors
  • Make a switch for LED’s that was easily accessible

Whilst making this simulation I have encountered a few problems.

Although I glued down the edges of the pipe to make it water-tight, I still experienced some flooding on the top of my wood when the pump was switched on due to the fact that when I pierced the holes in the pipe the force pushing from the other side broke some of the seals. I then proceeded to re-glue all the edges again. Even after doing this I still experienced small amounts of flooding; however it was less than the previous time so I continued to repeat this process until it stopped. Unfortunately, as I had only protected the wood on the inside on the simulation and inside each hole as I hadn’t foreseen there being any major leaks the MDF had already started to swell. This could have been from either/or a combination of the top of the wood getting wet between the pipes or the water droplets not dripping straight down through the holes but running along the underneath of the pipe where the wood was not protected.

These effects then resulted in a new problem. After stopping the pipe from leaking on the roof, I then turned on the pump to see how the simulation appeared on the inside from the user’s point of view. I then discovered that out the 25m of pipe that I had pierced at roughly 1 inch intervals, only a limited number of holes had water dripping through. I do not know what exactly has caused this but I only guess at either the unlikely scenario that the wood has swollen so much that there is no room for the water to drip through or that from re-sealing the entire pipe again from the leaks the glue has sealed up a large number of the holes.

If I was to remake this simulation I would definitely spend the extra money and have an acrylic roof that I then drilled the holes into so that it was water proof and would be less of a problem if any leaks did occur.

Ursa Minor

Cassiopeia


Ursa Major

Basic Structure

Internal View

Floor With Rain

Ceiling

Internal View With Rain

Post-apocalyptic living

I started thinking about the amount of destruction that would occur in an apocalyptic situation, amount of remaining areas of the country and artefacts still in tact and how this would cause various items to become essentials in order to survive.  I began by identifying possibilities for what these items might be and started to look into storage solutions for people’s possessions and utensils for day-to-day that would maintain a level of compact living.

On researching into this, I discovered that many artists and designers had also had similar ideas in producing the most efficient method of storage, such as Michael Johansson and Joseph Joseph: a large kitchenware company.

This led me to contemplate other methods of storage and consider the need for items to be made easily transportable in order to maintain survival.
Flash floods, caused by the extreme effects of global warming, bring devastation to areas across the country.  Fields of crops become waterlogged and unusable; which reduces the amount of harvested food available.  Shops and houses are destroyed and the remains of people’s personal possessions and belongings are scattered amongst the debris.  The reduced amount of remaining land and resources becomes sought after and recyclable materials that can be found and collected, become essentials in day-to-day living and survival in the new order of the world.  New items of water-resistant, protective clothing become fundamental.  The lack of modern manufacturing processes forces homemade and primitive production methods to be put into practice, as people fashion garments out of recycled materials to preserve their dignity and maintain a social decorum in the new world.
I began researching into films featuring apocalyptic themes.  I then used a selection of the sourced imagery as a stimulus and extracted key aspects from the clothing that I could integrate into my own designs.

Clothing is worn to both preserve dignity and for protection.  The various elements I have extracted and plan to consider are the durability of the chosen material to safeguard the body, allowance for movement through flexibility or divisions, coverage, construction methods based on resources and additional components, such as pockets, etc.

Armour is used to protect the body from unwanted damage.  Lamellar, chain mail and plates were the three earliest forms of body armour.

Lamellar is made from pieces of leather that have been sewn together to form a covering for the body.  Chain mail was an evolution of lamellar, which consisted of a series of linked, heavy, metal rings.  Metal plates were added to chain mail to protect specific vulnerable areas and this developed into plate armour with the Romans and even further into a full body suit in the Gothic era.

I intend to integrate elements of strong protective panels into my design as this will support and preserve the body from unwanted harm.

After looking at a selection of artists who have created work from recycled materials, such as Wayne Hemingway; the original founder of Red or Dead clothing; Jane Lawrence, Susan Stockwell, Lira Leirner, etc.  Of these artists/designers I have been most influenced by the work of Gary Harvey and Jolis Paons.

Not only the use of materials but the methods of manipulation used are stimulating and by using very simple methods they have created rather diverse effects.  I plan to use an amalgamation of these ideas to manipulate my own materials.

http://www.youtube.com/watch?v=olL5_Ly5sRs&feature=player_embedded#!

During my research I came across this video and I found it really inspiring. It has made me consider using a wider range of objects and think about ways I can unique ways I can incorporate them.

Whilst researching I was reminded of a couple of pieces of work featured in an exhibition I visited a couple of years ago.

http://www.eskimodesign.org/hello/?p=125

These pieces show how numerous versions of the same item can be attached together to take on a new form.  I may plan to develop this technique into my own work.

Many power lines run alongside rivers and most nuclear power stations are positioned near the coast, therefore flash floods would cause a lot of damage to the electricity supply and so the use of electrical devices would be restricted. In addition, most electrical devices would become water damaged, so, even if a source of electricity could be obtained. the item would have only a small chance of working. This means that only primitive methods of construction would be feasible.

In a post-apocalyptic situation a lot of people are going to be set back from all the technological advancements and will have to revert back to primitive methods.  I have decided to investigate into tribal clothing which would have used basic construction and decorative techniques.

Along with hand sewing I find the popular idea; originally used in both Native American Indian and Aboriginal tribes; of piercing and lacing material together intriguing as this original method is not only functional but also decorative.  In addition, there was one particular Native American Indian, decorative technique which I found interesting and felt would be useful to integrate into the cuffs of my clothing and that is Peyote.  This stitch is commonly associated with beadwork and has been developed over the years but still remains very popular now.  In a post-apocalyptic world one would need to utilise knowledge gained from researching the basic manufacturing techniques of historical and cultural contexts.  The manufacture of garments would reflect the influence of primitive tribal technologies but with the added advantage of utilising modern, technological advancement of material development.

I have brainstormed ideas for different items of clothing using suitable, recycled materials and incorporating a variety of practical functions into the designs.

I have assessed the practicality and appropriateness of my designs of jacket, trousers and headgear and selected some of the best aspects from certain ideas and incorporated them together in order to come up with my chosen design.

Carrying a lot of heavy items around all day can often become very tiring, so I have tried to spread out where the body strength is used to carry items to maintain people’s stamina.  This has inspired me to design a piece of headgear to be used as a method for transporting items, as people’s head and shoulders can support a lot of weight; examples of this are commonly seen amongst Africans and builders.

http://www.youtube.com/watch?v=lV-iP1jSMlI

The material used to make the outfit from (shower curtain) frays easily and, because of the lack of electrical devices available, the use of overlockers would be unfeasible.  After researching into alternative techniques, which could be used to achieve the same effect, I have come across hemming and french seams.  French seams can easily be achieved by hand sewing and leave the garment with a neat finished edge.

To allow the headgear to be able to blend into the urban environment more, I have made it multifunctional so that it can also be transformed into a bag.  Through carefully planning the location of where the straps, which tie the headgear onto the head, should be attached, by simply undoing the ‘scarf’ and re-tying it high above the lid, the headgear can then be carried over one shoulder as a bag.

The increase in temperature causing an accelerated effect of global warming and creating a rise in sea level and extreme flash-flooding will have a large impact on the climate and the animals living within it.  Although, due to location, some animals could become nearly extinct from the effects of the floods, some creatures, such as midges, will rapidly increase in number.  Midges are attracted to damp, flooded areas which is why they are commonly seen in fenland areas.  Mass floods will cause a surge in midges and the loss of land will bring the insects further inland.  To combat this problem I have built a net which is attached to the base of the headgear.  This can be lowered over the face in order to protect it from being bitten.

Here is a list of found materials used to create the outfit:

  • Shower curtain – water resistant material used as the main fabric of jacket, trousers and headgear/bag and used for additional decorative elements to help to blend into the urban environment
  • Eyelets – (From shower curtain) used to string the pockets to the trousers so they can be wrapped around the front or back of the leg for ease of movement
  • Dish Cloths – sewn together to form an internal thermal lining
  • String – Draw string in waistband, ties to hold pockets on trousers in place around the front/back of leg, attach protective guards to the body
  • Velcro – used to secure the contents of the pockets, attach storage boxes/protective panels onto the inside of the jacket, fastening on jacket
  • Plastic bowls – main structure of headgear/bag
  • Nuts and bolts – used to attach the two bowls together
  • Sponges – Padding on the inside of the bottom bowl for comfort and added protection when worn as headgear
  • Rubberised placemats – used to form the lid of the headgear/bag
  • Pizza bases – used in between the rubberised placemats to add strength and stability to the lid of the headgear/bag
  • Shower curtain hooks – used to hinge the lid on the headgear/bag
  • Plastic tubing – used as a protective seal around the edge of the lid on the headgear/bag
  • Netting – used to protect the face against vast increase of midges attracted from the flood water
  • Silicone ice cube trays – used to form attachable protective guards
  • Bedroom drawer fabric inserts – used as padding/protection in the back of the jacket and as scavenging/storage boxes
  • Thread – used to hand sew materials in place
  • Glue – used to attach materials together

I have decided to present the outfit on a mannequin as devices such as cameras would be destroyed in the floods and wouldn’t be an essential item for people to keep on them so in a post apocalyptic situation the outfit would only be seen by being viewed in person.  Also, by using a mannequin it immediately presents how the outfit would be worn.

Sculpture you can move through

I began by brainstorming different forms that are currently in existence that can be moved through, such as; doors, archways, tunnels, trees, climbing frames, spider webs.  Whilst doing this I was reminded of artist Eva Schjølberg’s work I viewed at the Cultex exhibition.  Another artist who has created work made up of a series of white tunnels or ‘hallways’ is Alfred Hitchcock.

Eva Schjølberg is part of a collaborative group called Cultex. Their work is influenced by the rich culture found in countries like Japan and China.  I found Schjølberg’s tunnels, made out of textiles, easily guided you through the different areas of the exhibition.  I feel the use of soft, white fabric to construct the tunnels reduces the sense of claustrophobia. I intend to use an element of textiles in my own sculpture, as the delicacy of the material is more inviting and should increase people’s urge to move through it.

Alfred Hitchcock has produced a series of hallways for people to walk through.  Each one is connected by a single doorway leading onto the next and every hallway appears to be identical to the one before it; although they are gradually decreasing in height.  Unlike Eva Schjølberg, Hitchcock’s white hallways do not seem to have been created to guide people through the exhibition but to see how they respond to the given space.
I find his use of repetition to create a tunnel effect very interesting and I would like to incorporate this into my own work as it makes the participant interact with the piece for a longer duration as they move through it.

Of the different structures that could be moved through, I found one of the most interesting to be a spider web: a form within nature, consisting of geometric, repeating patterns; an almost invisible structure, composed of delicate threads that gain solidity through complexity.  I felt that by using that as my stimulus I would be able to experiment more with scale and incorporate elements of pattern into my sculpture.  Lara Schnitger is one artist who has produced work in a similar style to this.

Lara Schnitger’s aim was to create a way to section off different areas of the exhibition so that people could only look at one piece of artwork at a time.  I find her work very interesting as she has produced a spider web style sculpture but has approached it from a contrasting perspective of blocking people’s path.  I intend for my own work to navigate people through the space as they move through it.

I thought about the different ways I could use textiles in my work and one of the most interesting I found was through the use of threads.  Most people imagine a sculpture you can move through as being an architectural installation produced on a large-scale, often outside, using more robust materials.  So by using thread for the construction it is rather contrasting, as it is a smaller, finer medium more suited to a sculptural installation within an art gallery.

I began to experiment with the different types of shapes and patterns I could make using thread.

Afterwards, I noticed that these had a strong link to spirograph patterns.

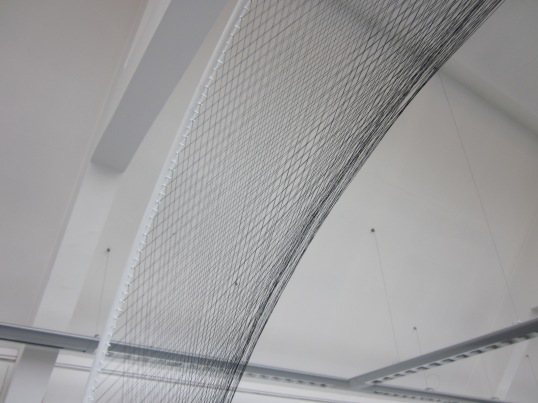
I have decided to take my thread based, spirograph designs and use them to form a tunnel-like structure for people to walk through.  Looking at different designs that create an arch shape, I have analysed how each design will affect the scale of the piece so that the arch is suitable for people to walk through.

The design was selected based on the height of the arch and overall structure; taking into consideration the limitations set by the indoor location I plan to present it in, and the amount of design that is visible so the feature does not become insignificant.

Here is a 3D mock-up of my design to the scale 1:6.  I have explored the layout of the threads running between the entrance and exit to form the tunnel.  My aim was to force the tunnel to decrease and then increase in height so that people had to duck as they navigated their way through it.  Also, this would visually create additional length to the tunnel as it would add lines of perspective.

I experimented with allowing the threads to cross by staggering them to create fixed points, where the tunnel became narrower.  Unfortunately the construction of this caused a large section of the exit to become blocked off and having multiple points of perspective resulted in some of the depth to be lost.

I have amended the design so that it creates a natural parabolic curve and focuses on one central point of perspective.

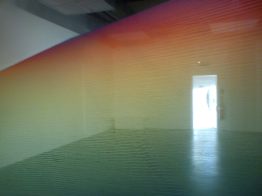
“Introducing Gabriel Dawe” – Plexus No. 10: Materialising the Structure of Light.

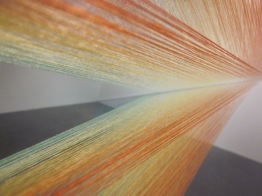
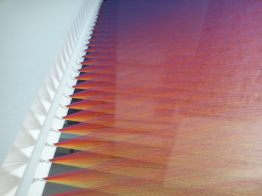
Gabriel Dawe’s large-scale structures using a network of threads shows the spectrum of colours visible when a ray of white light is shone through a prism.  I found his installation rather inviting as you walked through the guided paths of disorienting colour and line.  Dawe’s use of thread within his work is very controversal as it rebels against the traditional perceptions of “women’s work”.

I had a feeling of peace and serenity as I walked through Dawe’s exhibition.  The smooth flowing lines created by the threads made it a very tranquil environment.

I found Dawe’s work very similar to my own ideas for my sculpture.  Both large-scale sculptures are produced by the intricate layout of thousands of metres of thread.  One difference is that I don’t plan to use a series of different coloured threads.  The focus of my sculpture is on the design created by the threads so multiple colours would detract from this whereas Dawe’s focus is on the creation of a wall of an array of colour.  The use of numerous threads from each hook to gives his structure a solid appearance which is rather inspiring.  I may try to incorporate a similar technique between the entrance and exit archway so that it creates an enclosed feeling within the tunnel.

Tamar Frank’s key media is coloured lights.  In her recent piece ‘A thin line between space and matter’, she used phosphorescent threads to highlight detail created.  The phosphorescent threads absorb light energy that is emitted slowly.  This creates a colourful architectural form both delicate and intricate.  The inspiration for this piece came from the shapes and spaces created by the interior of the exhibiting building. I find this architectural detail is mirrored by the medium, which offers an intensity of colour, obtained from light energy, which transcends with the darkness.   This same delicacy of form has been created in Modernist works by the constructivist Naum Gabo.

I am going to make the rings of my sculpture out of white plastic pipe and screw in a series of hooks at 2cm intervals to attach the thread.  I am going to fashion wooden pegs to connect the pipes together that follow the angle of the curve.

When I did bent the pipes into a circle the curve of the wooden pegs caused a gap to be created between the pieces of pipe so I had to recreate the pegs out of metal in order for the join to be streamline.  This resulted in a complicated process of sandblasting, grinding, sanding, lubricating, rapid heating and cooling and pressure.  To fix the pipes onto the base I created metal pegs which I then flattened and angled to the correct degree of the curve and then bolted to the base boards.

To allow the focus of the sculpture to be on the design of the threads rather than the architectural structure, I have painted the form white so that it blends in with the white walls of its surrounding.

I have selected the location of where to exhibit my sculpture very carefully.  I needed to attach my sculpture to the ceiling in order to obtain the required amount of tension in the pipes to maintain its circular form.  I chose an exhibition space with a high ceiling and overhead beams and built the sculpture to fit the space, enabling fishing line to be tied around the beams to help support it.

Unfolds, opens out or spreads out

I set off by brainstorming various things that unfolded opened out or spread out, such as; a pack of cards, flowers, wings of animals or insects, books, leaflets, stories, etc.

As I have a keen interest in origami and pop-ups I decided this would be a good starting point for this project.  I began looking into the work of two pop-up artists who have both produced their own work and also done a lot of collaborative pieces; Matthew Reinhart and Robert Sabuda.  I explored some of the technical elements and analysed processes they used to see if I could incorporate aspects of these into my own work.

Matthew Reinhart and Robert Sabuda  are popular pop-up book designers and are highly skilled in paper manipulation and engineering.

I find the pop-up element is always the dominant feature on each page and this helps to communicate as much of the story visually. I intend to use some of the techniques that are applied so that the use of text may become redundant in my own pop-up.

Most of their work is based on child-like, fantasy themes as this allows them to be more extravagant with their designs.   Their paper engineering is not limited to just using paper, often pieces of dowel or string are incorporated in order to create the optimum movement. I would like to use a variety of materials to produce my own pop-ups.  This will allow me to create a more tactile piece and help to portray the story I am trying to get across.

I became inspired by an outfit made out of concertinaed paper, and this influenced an array of new ideas.

When I looked at my ideas I soon realised that most of them had become static pieces that just contained a folded/unfolded or spread out appearance.  I then explored ways I could develop an idea further so I could create a piece of work that was mechanical.

I selected the bracelet made out of slightly unfolded triangles to develop and studied the dynamics of the shape used and its versatility.

One of the areas I looked at was unusual ways the triangles could be connected together to create other shapes and this led me to investigate it as a 3-Dimensional shape in the form of a pyramid.

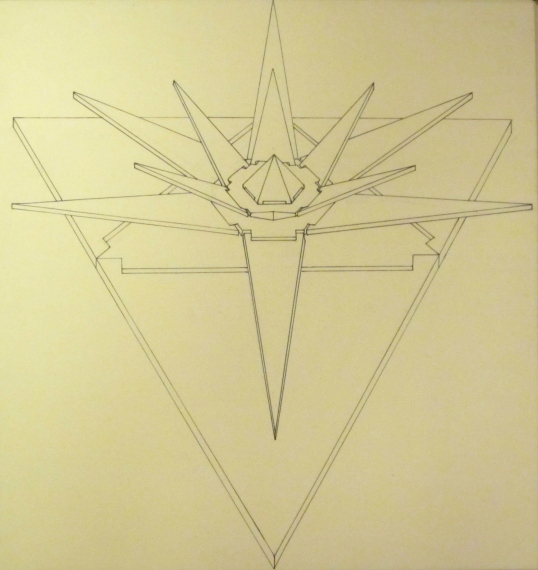
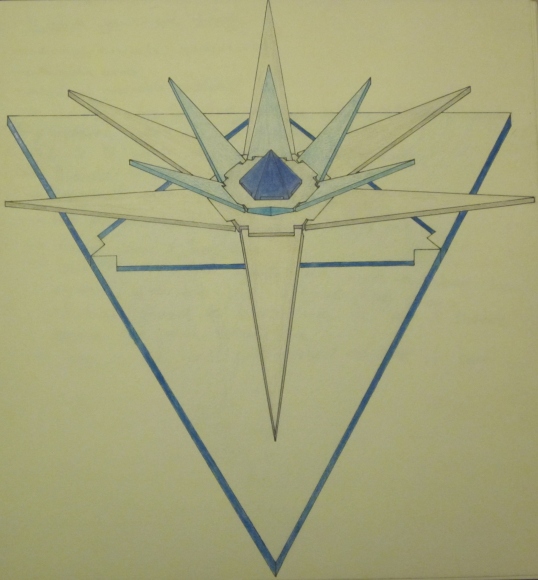
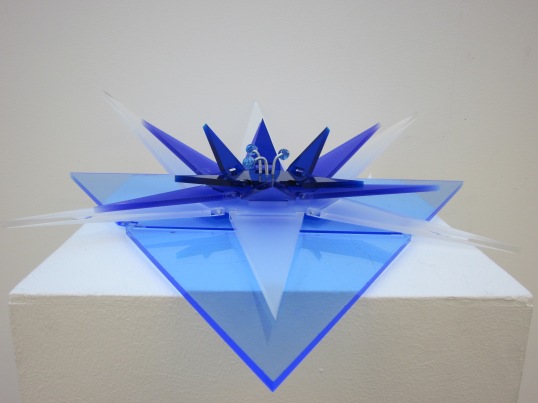
Still keeping in mind the idea of accessories, my experimentation with pyramids led me to develop a ring design.  It consisted of a plain band set with a triangular based pyramid embellishment.  This then unfolded to reveal a smaller pyramid and the same again.  I then tried including a hexagonal base as well as the triangular based pyramids to give it a strong resemblance of a flower as if it was opening out and blooming.

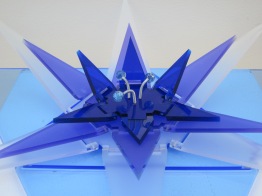
I originally thought about making this piece out of metal but due to the dynamic shape of the design I think it would be eye-catching if the use of colour was incorporated into it.  In order to achieve this, it has led me to consider its construction out of acrylic.

When I looked into the construction of the embellishment of the ring and making the hinges for the pyramids out of acrylic, it led to some technical problems, due to the small-scale, which caused the piece to be redesigned into a bracelet and then into a fascinator to combat this.

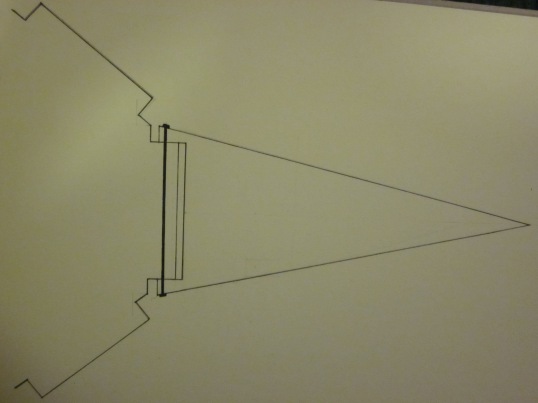
To create the hinges I am going to have two small tabs at either end of each piece that unfolds out and drill holes through these so that I can peg it into place using thin metal rod.  I plan to use 5mm thick acrylic so that I have enough thickness to drill into the side of it, to form the holes for the pegs.  Each piece of the fascinator is going to be laser cut so that the tabs for my hinges fit together exactly.

At the Lost in Lace exhibition Ana Holck produced work that included the use of perspex hinges, which I am using for my unfolds, opens out or spreads out project.  Her architectural work tries to show an understanding and awareness of space as she replicates the hexagonal concrete pavement that is commonly found in Rio de Janeiro out of perspex and hinges the shapes so that the structure flows throughout the interior of the museum.  I find Holck’s construction of the hinges does not appear to impair the continuity of the visual effect which is what I would like to do with my piece of haute couture fashion accessory to make it more aesthetically pleasing.

When I looked into the construction of the embellishment of the ring and making the hinges for the pyramids out of acrylic, it led to some technical problems, due to the small-scale, which caused the piece to be redesigned into a bracelet and then into a fascinator to combat this.

I had to change the design of the hinges in order to be able to construct it.

After exploring various colours and finishes in perspex, I felt the angular fashion of the flower petals were better suited to a cooler colour scheme.  The mixture of transparent and frosted finishes also suggested an icy feel.

To maintain its strong resemblance to a flower I’ve experimented with making anthers, to sit within the central pyramid.

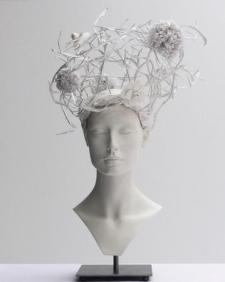
After researching haute couture headpieces, I have thought about displaying it on a plinth with photographs behind it to show the piece in context.  Someone with blonde hair would be best to model the fascinator as this would not dull the transparent colours of the perspex.  I would have them wearing a plain dark blue top that matches the colour of the central pyramid to accent this key bit of detail.